The first time I melted wax, I did it in a saucepan directly on the burner. I was in a hurry, the wax was almost at temperature, and then I smelled that sharp, overheated smell that says you have ruined a batch. The wax scorched, the pan was a nightmare to clean, and I had to start over. That is how most candle makers learn why a double boiler matters. You do not put wax directly over heat. You put the wax in a pouring pot, and you put that pot in water, and you let the water do the heating. It is slower, and it is safer, and it is the difference between a clean pour and a wasted afternoon.
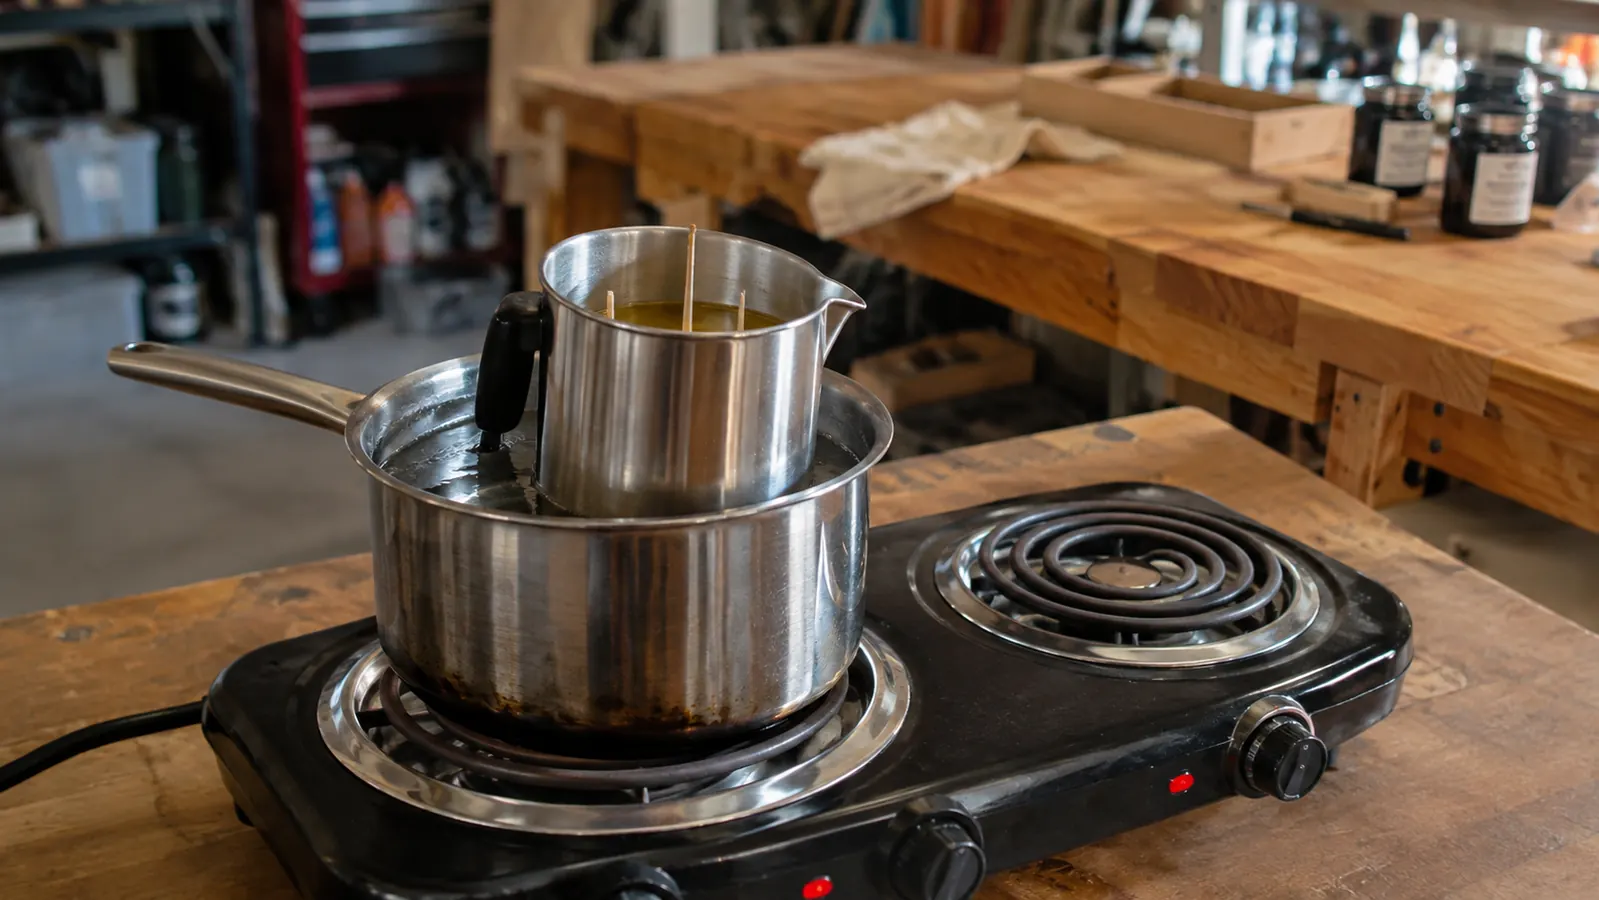
I have been making candles in a converted corner of my garage for about four years now, and I still use the same method every time. My setup is simple: a two burner electric hot plate, a saucepan I do not use for food anymore, and the EricX Light Pouring Pot, which is the 4 pound aluminum pot I reach for on every batch. This guide walks through the whole process, from setting up the water bath to pouring clean, so you can melt wax safely without guessing.
Start with a pot that pours clean
The EricX Light Pouring Pot is the one I keep on my hot plate every weekend. The dripless spout and heat resisting handle make the safe method easier, because you are not fighting a wobbly handle or a messy pour at the end.
Amazon Check Today's Price on Amazon →Step 1: Set up your water bath
Fill a saucepan about a third of the way with water. You want enough water to come partway up the sides of the pouring pot, but not so much that the pot floats or that water can splash into the wax. I use a saucepan that is wider than the base of my EricX Light Pouring Pot, so the pot sits down into the water instead of balancing on top of the rim. The first time I tried this, I grabbed the smallest saucepan I owned, and the pot balanced on the rim like a lid. The water barely touched the bottom, the wax took forever to melt, and I ended up holding the handle the whole time. A wider pan fixed it in one trip to the kitchen cabinet.
Put the saucepan on the burner and start the heat on medium. You do not need a rolling boil. A gentle simmer is plenty, and it is easier to control. If the water boils hard, it can bump the pot around and it can push steam up around the handle. A simmer keeps everything calm. On my hot plate, medium is the sweet spot. High makes the water dance and sends steam up the side of the pot, and low takes so long that I start checking my watch. Medium, then a small nudge down once the water is moving.
One thing I learned the hard way: do not walk away while the water heats. Wax can go from solid to liquid faster than you expect, and the first time you melt a new wax, you want to be right there watching. Stay in the room until the wax is fully melted and you have turned the heat down. I lost a batch of coconut soy one rainy Saturday because I went inside to answer the phone and came back to a pot that had climbed past 200 degrees. The wax looked fine until I poured it, and then the fragrance was gone and the tops came out dull. It still burned, but it smelled like nothing.
Step 2: Add wax to the pouring pot
Weigh your wax before it goes in the pot. I use a kitchen scale and I weigh in grams, because fragrance oil is measured as a percentage of wax weight and it is much easier to do that math in grams. For a 4 pound pot, I usually melt about 2 pounds of wax at a time. That leaves room in the pot for fragrance oil and for stirring without sloshing. Two pounds of soy fills about four 8 ounce jars, which is a good size for a weekend batch. If I need more for a market run, I melt two batches back to back instead of crowding the pot.
Break the wax into chunks that fit comfortably in the pot. Big blocks melt slowly and leave cold spots in the middle. Smaller chunks melt evenly and faster. I do not bother with shavings, because they can melt so fast that the temperature climbs past your target before you notice. Chunks about the size of a walnut are a good middle ground. I use a butter knife to score the block and then snap it over the edge of the table. It takes about five minutes to break up two pounds, and it saves a lot of waiting later.
Set the EricX Light Pouring Pot into the water bath and let the wax start melting. Stir occasionally with a dedicated wax spoon or a silicone spatula. Do not use the same spoon you use for food. Wax is very hard to fully wash out of porous tools, and you do not want candle scent in your pancakes. I keep one wooden spoon with a burned tip that has only ever touched wax. It lives in a coffee can on my shelf, and it has stirred every batch I have made in the last two years.
Step 3: Watch the temperature, not the clock
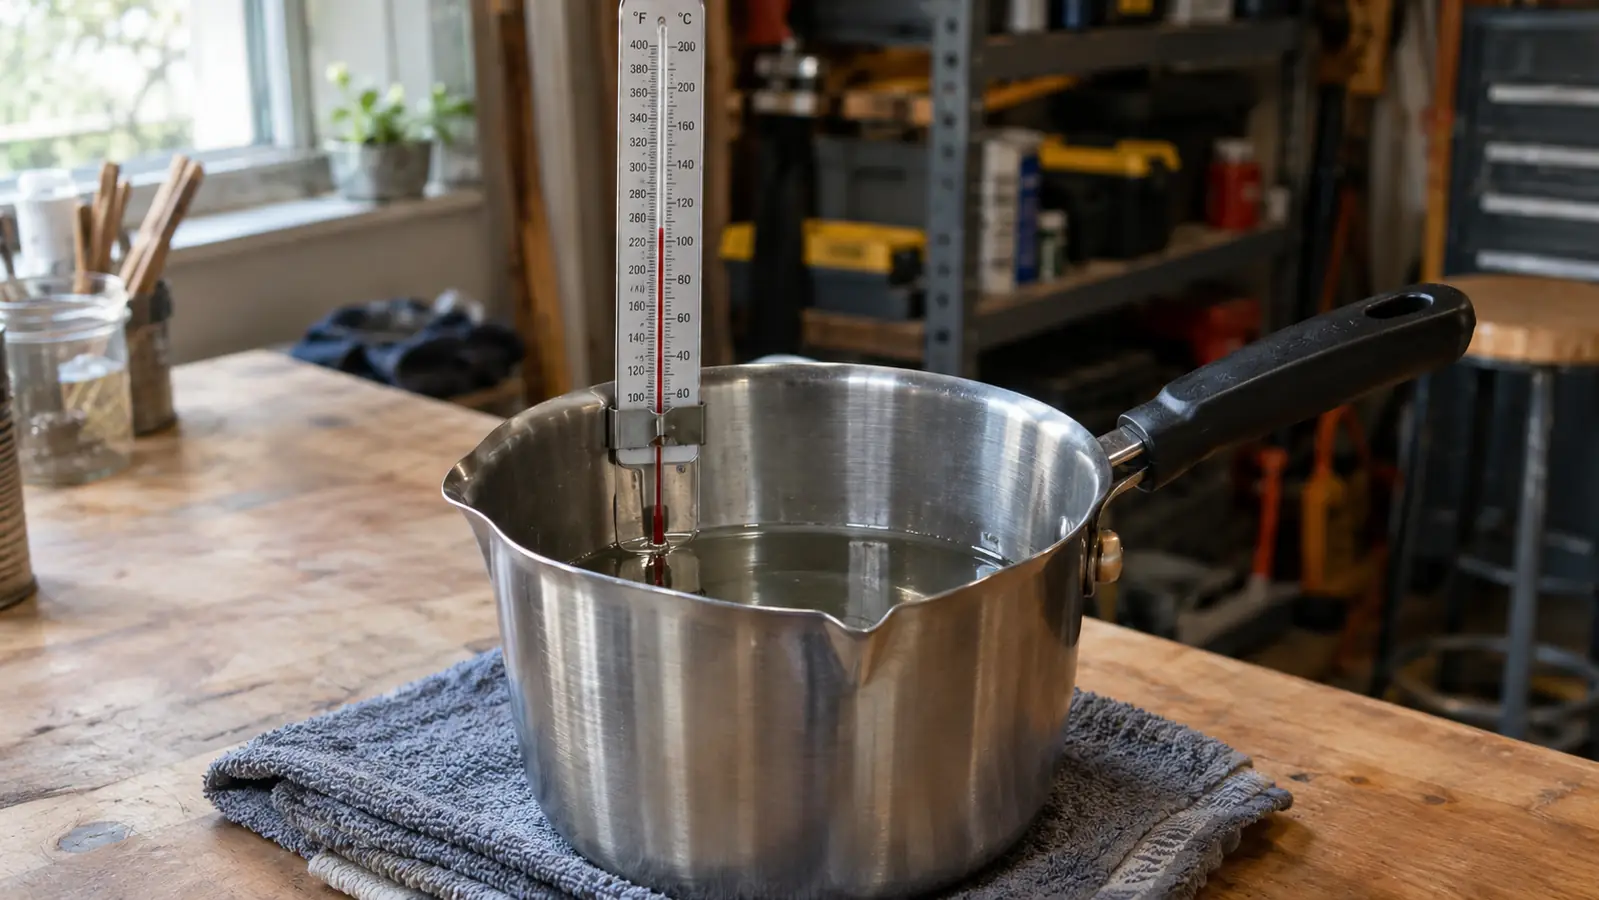
Different waxes have different melting points, and the only reliable way to know where you are is a thermometer. I clip a candy thermometer to the rim of the pouring pot and I keep an eye on it the whole time. Soy wax usually melts around 120 to 130 degrees Fahrenheit, and I pour it around 135 to 140. Coconut soy blends behave a little differently, and beeswax needs more heat. The label on your wax bag is the best guide, because every supplier formulates a little differently. My regular soy supplier prints the melt range right on the bag, and I still write it in my notebook the first time I open a new batch.
The reason the double boiler method matters here is that the water bath tops out at 212 degrees Fahrenheit. That means the wax cannot get much hotter than the water around it, as long as the water does not boil dry. Direct heat on a burner can push wax well past 250 degrees, and that is where fragrance burns off, color shifts, and the wax starts to smell scorched. I found that out with my very first batch of soy wax, when the bottom of the pan hit 280 and the whole kitchen smelled like burnt toast for two days.
If you are melting a wax you have never used before, melt a small test batch first. Write down the temperature where it is fully liquid, the temperature where it pours well, and how it behaves as it cools. That little notebook has saved me more batches than any piece of equipment I own. When I switched from straight soy to a coconut soy blend last spring, the test batch told me the blend poured better ten degrees cooler and cured two days faster. I would not have guessed either of those from the bag.
Step 4: Add fragrance and color at the right moment
Once the wax is fully melted and sitting at your target temperature, take the pouring pot out of the water bath and set it on a folded towel on your work table. This is the moment to add fragrance oil. I measure fragrance at about 6 to 8 percent of wax weight, which means 0.6 to 0.8 ounces of oil per pound of wax. Stir it in slowly and thoroughly. Fragrance oil does not dissolve instantly, and if you skip the stirring, you get pockets of strong scent that fade fast. I stir for a full two minutes, scraping the bottom and the sides, before I even look at the color.
Color is the same story. Add liquid dye a drop at a time, because it is much easier to add more than to take it away. I have made more than one batch that was supposed to be cream and came out a shade darker than I wanted. One batch of vanilla bean came out the color of a paper bag, and I sold it anyway as caramel. Stir, check the color, and stop while it is still a little lighter than your goal, because the color deepens as the wax cools. A single drop of dye in two pounds of wax is enough to make a noticeable difference, so go slow.
Keep the pot off the heat while you stir in additives. The residual heat in the aluminum is enough to keep the wax liquid, and it keeps the temperature from climbing while you work. The EricX Light Pouring Pot holds heat well, which is good for this step, but it also means the pot stays hot for a while after you set it down. Set it on the towel, not directly on the table. I learned that the first week I had the pot, when I set it on the bare butcher block and it left a pale ring in the wood that is still there.
Step 5: Pour and clean up while the pot is still warm
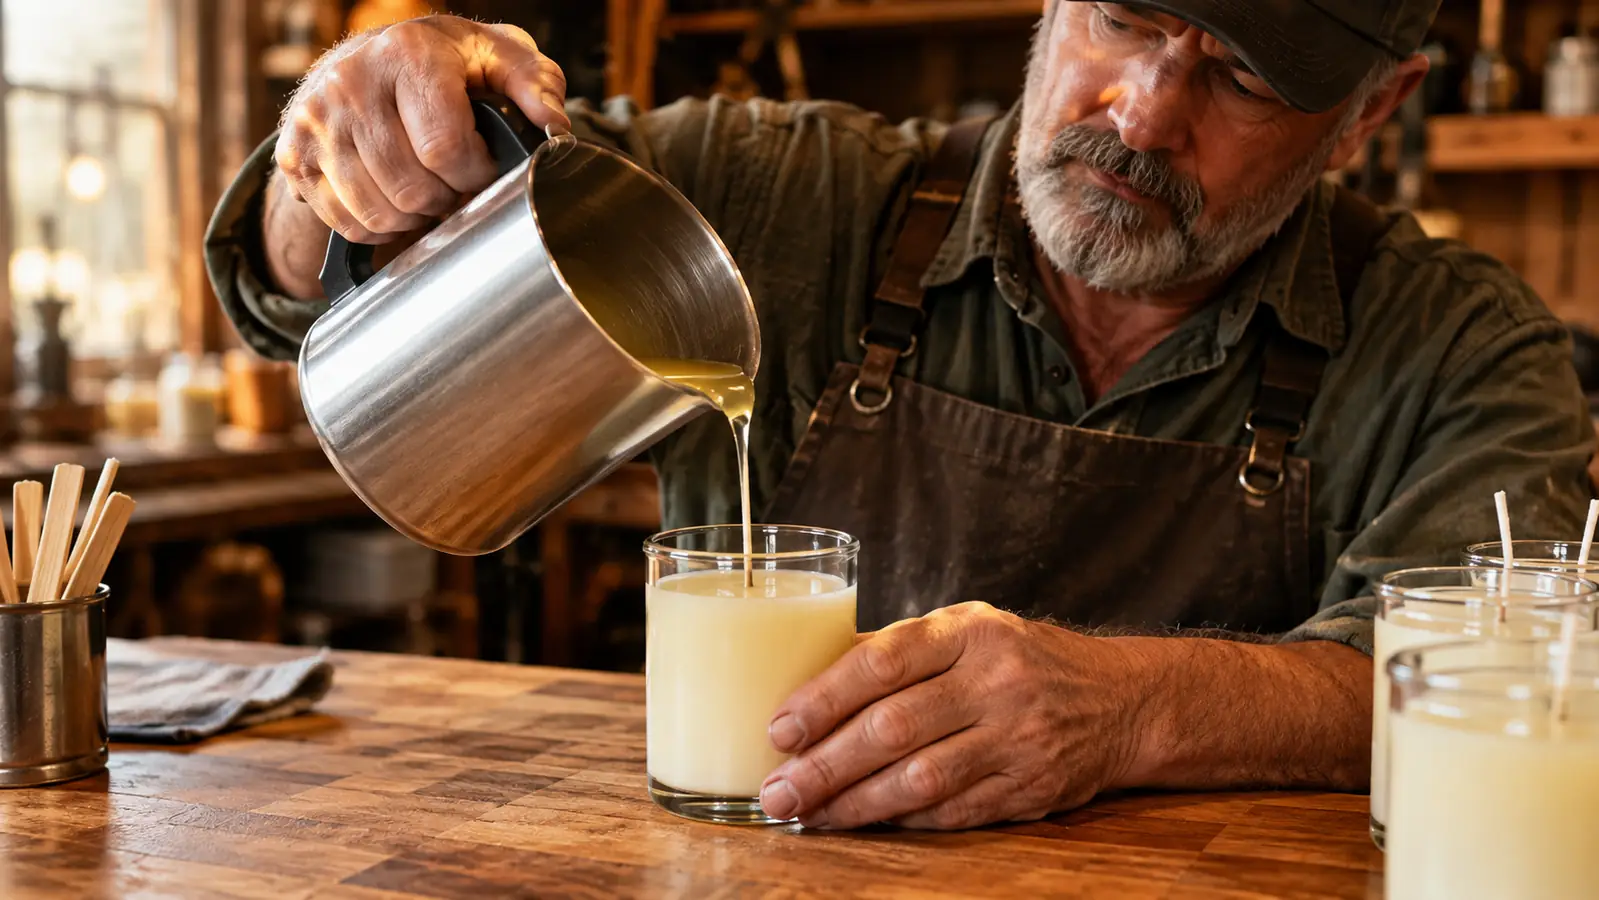
Pour the wax into your prepared containers with the spout of the EricX Light Pouring Pot right over the wick. The dripless spout is the feature I did not know I needed until I had it. A regular pitcher dribbles wax down the side, and that wax hardens into a ridge that makes the candle look messy. The dripless spout keeps the stream narrow and controlled, so you can fill a jar without wiping the sides. I can pour a full 8 ounce jar in one slow motion now, and the only drips I get are the ones I cause by rushing.
Leave a little headroom in each container. Wax shrinks as it cools, and if you fill the jar to the top, you will end up with a sunken well around the wick. I fill to about a quarter inch below the rim, then do a second pour later if the candle needs a smooth top. The second pour is easy with the same pot: warm the leftover wax back up in the water bath, let the first pour set for a few hours, and spoon in just enough to level the top.
Clean the pot while the wax is still warm. Wipe out the excess with a paper towel, then wash with hot soapy water. Do not pour melted wax down the drain, because it will harden in the pipes and that is a plumbing bill nobody wants. Let the pot cool completely before you store it, and it will be ready for the next batch. I wipe the outside with a dry cloth too, because the aluminum picks up water spots if I leave it wet, and a clean pot makes the next Saturday morning go faster.
What Else Helps
A good pouring pot is the center of the setup, but a few other things make the process smoother. A dedicated thermometer that clips to the pot rim is worth the few dollars it costs. A heat gun helps with sinkholes and rough tops on the second day. And a cheap metal tray under your containers catches the occasional drip so it does not end up on your table. None of these are fancy. They are just the tools that keep a hobby from turning into a chore.
I also keep a notebook with the pour temperature and cure time for every wax I use. Cure time is the part new candle makers skip. Most soy candles need at least a week to cure before they burn clean and throw their full scent. If you pour on Saturday and sell on Sunday, the candle will burn, but it will not smell like much. Give it the week. Your customers will notice the difference. I pour my market candles three weeks ahead now, so every single one has cured before it sits on the booth table.
The water bath tops out at 212 degrees, so the wax cannot scorch the way it can on direct heat. That is the whole trick: let the water do the heating.
Make the safe method the easy method
The EricX Light Pouring Pot is the pot I reach for on every batch. A dripless spout, a heat resisting handle, and aluminum that holds temperature well. If you are ready to melt wax the safe way, this is the pot to start with.
Amazon Check Today's Price on Amazon →